

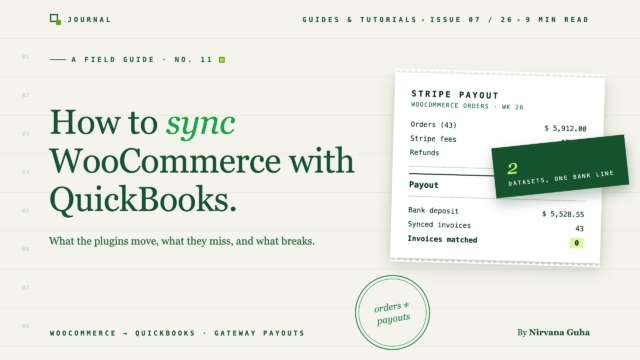
주문을 QuickBooks로 가져오는 것은 쉬운 부분입니다. 이 가이드는 플러그인 목록에 언급되지 않은 부분, 즉 장부를 은행과 일치시키는 것에 관한 것입니다.
QuickBooks Online 파일에 1,400개의 새 송장이 있으며, 그중 단 하나도 정확합니다.
커넥터를 설치하고 몇 가지 필드를 매핑한 후 작동하는 것을 지켜보았습니다. 모든 WooCommerce 주문은 고객 이름, 품목, 배송, 세금과 함께 QBO에 도착했습니다. 플러그인 기능 페이지의 모든 측정 기준에 따라 WooCommerce QuickBooks 통합은 완료되었습니다.
그런 다음 은행 피드를 열었습니다. Stripe는 월요일에 $6,782.40를 입금했고, PayPal은 수요일에 $1,911를 입금했습니다. 그리고 이 1,400개의 송장 중 단 하나도 이 두 숫자 중 어느 것과도 일치하지 않습니다. QuickBooks는 이제 수십 개의 열린 송장에 대해 단일 입금을 일치시키도록 요청하고 있으며, 그중 어느 것도 합산되지 않습니다.
이런 경험이 있다면, 대부분의 상점 주인들이 하는 것처럼 플러그인을 제거하고 CSV 내보내기로 돌아가서 전체 카테고리가 잘못되었다고 결론 내렸을 것입니다. 그렇지 않습니다. 하지만 판매된 것 — 주문 동기화 — 은 실제 문제가 아니었습니다.
실제 문제는 WooCommerce와 은행 계좌가 두 개의 다른 현실을 설명하고 있으며, 주문 동기화로는 그 사이를 번역할 수 없다는 것입니다. 이 게시물은 그 이유를 숫자로 설명하고 실제로 조정되는 설정 과정을 안내합니다.
WooCommerce QuickBooks 통합 구축의 세 가지 방법
넓게 보면 모든 접근 방식은 세 가지 범주 중 하나에 속합니다.
1. 공식 QuickBooks 커넥터. Intuit 자체 커넥터(이전 OneSaas 엔진 기반)는 WooCommerce 주문을 송장 또는 판매 영수증으로 QBO에 푸시합니다. 저렴하고 Intuit에서 지원하며, 기본적인 주문 복사에는 명시된 대로 작동합니다. 주문에 대한 정보 — 고객이 무엇을 구매했고 WooCommerce가 무엇을 청구했는지 — 를 알고 있습니다.
2. 전용 동기화 플러그인. MyWorks Sync와 같은 도구는 훨씬 더 깊이 들어갑니다. 양방향 동기화, 세분화된 필드 매핑, 재고 및 고객 동기화, 실시간 푸시. 비즈니스가 개별 송장 — 도매 계정, B2B 고객, 특정 개인에게 연결된 결제 — 으로 운영된다면 해당 주문별 충실도는 실제로 가치가 있으며 MyWorks는 이를 잘 수행합니다. LedgerPort 대 MyWorks 비교에 대한 자세한 내용을 작성했으니 해당 경로를 고려하고 있다면 참고하십시오.
3. 수동 CSV 내보내기. WooCommerce에서 주문을 내보내고, 스프레드시트를 정리하고, QBO에 수동으로 분개 항목을 입력합니다. 총 제어, 소프트웨어 비용 제로, 그리고 볼륨에 따라 월 2~8시간 소요 — 게다가 지친 사람이 3시간째에 저지르는 모든 오류까지.
| 방법 | 이동하는 내용 | 비용 | 은행과 조정됩니까? |
|---|---|---|---|
| QuickBooks 커넥터 | 주문 → 송장/영수증 | 낮음 | 그 자체로는 아님 |
| 플러그인 동기화 (예: MyWorks) | 주문, 고객, 재고 | $-$$ | 신중한 지급 설정이 있을 때만 가능 |
| 수동 CSV | 입력하는 모든 것 | 당신의 시간 | 직접 지급 계산을 할 경우에만 |
세 가지 모두 공통적으로 가지고 있는 점을 주목하세요. 바로 주문 데이터에서 시작한다는 것입니다. 그리고 주문 데이터는 필요한 데이터 세트의 절반에 불과합니다.
주문 수준 동기화가 조정 작업을 방해하는 이유
이것이 구조적인 문제입니다. 어떤 플러그인을 선택했는지와는 전혀 관련이 없습니다.
WooCommerce는 주문에 대해 알고 있습니다: 고객, 항목, 총액, 세금. Stripe가 처리 수수료로 얼마를 공제했는지, PayPal이 지급을 일괄 처리했는지, 지난주 환불이 이번 주 입금에서 상계되었는지, 또는 화요일 지급에 차지백 수수료가 어떤 영향을 미쳤는지 알지 못합니다. 해당 정보는 결제 게이트웨이에 있으며, 완전히 별도의 데이터 세트이고 완전히 별도의 일정으로 관리됩니다.
한편, 은행 피드는 항상 게이트웨이 측의 이야기만 봅니다: 순 입금액, 게이트웨이 일정에 따라 일괄 처리됩니다. 따라서 동기화 도구가 주문을 QBO로 복사할 때, 은행 계좌에서 확인할 수 없는 데이터 세트를 충실하게 기록하는 것입니다.
작업 예시
주말 동안 스토어에서 96건의 주문을 받아 총 7,200달러의 매출을 올렸다고 가정해 봅시다. WooCommerce는 이를 3일간의 별도 판매로 보고하고, 주문 수준 동기화는 QBO에 96개의 송장을 생성합니다.
월요일에 Stripe는 하나의 지급을 보냅니다:
| Stripe 지급 - 월요일 | 금액 |
|---|---|
| 주말 총 매출 (96건의 주문) | $7,200.00 |
| 처리 수수료 (2.9% + $0.30 × 96) | −$237.60 |
| 환불 (지난주 2건의 주문) | −$180.00 |
| 귀하의 은행으로 순 입금 | $6,782.40 |
이제 QuickBooks에는 금요일, 토요일, 일요일에 걸쳐 총 7,200달러의 송장 96건이 있습니다. 은행 피드에는 6,782.40달러의 월요일 입금액 하나만 있습니다. 수수료 237.60달러는 귀하의 장부에 어디에도 존재하지 않습니다. 180달러의 환불은 이번 주 데이터에 포함되지 않은 주문에 대한 것입니다. 이 96개의 송장으로는 해당 입금액과 일치하는 조합이 없습니다. 구성상 계산이 맞지 않습니다.
매월, 모든 지급, 모든 게이트웨이에 대해 곱해보세요. 이것이 1,400개의 완벽한 송장과 그 어느 것과도 일치하지 않는 은행 피드를 갖게 되는 이유입니다.
[이미지: WooCommerce 주문 데이터와 Stripe 지급 데이터를 두 개의 별도 스트림으로 보여주는 다이어그램. 은행 피드는 지급 스트림에만 연결되어 있으며, 수수료와 환불 시점이 존재하는 간격이 표시됨]
이 시점에서 대부분의 사람들은 세 가지 중 하나를 결론짓습니다. 일부는 북키퍼를 고용해야 한다고 결정하고, 일부는 스프레드시트로 돌아가고, 일부는 문제가 구조적인 문제임을 깨닫고 아키텍처를 수정합니다. 이 섹션은 세 번째 그룹을 위한 것입니다.
“오픈 소스이므로 무료 플러그인이 처리해야 합니다”
합리적이지만 잘못된 가정을 직접 명명해 봅시다.
WooCommerce는 오픈 소스이고, 생태계에는 모든 것을 위한 플러그인이 있으며, 대부분은 무료 또는 저렴합니다. 따라서 본능적으로는 무료 플러그인이 QuickBooks도 처리해야 한다고 생각합니다. 그리고 무료 플러그인은 플러그인이 잘하는 것, 즉 주문 데이터를 한 데이터베이스에서 다른 데이터베이스로 이동하는 것을 처리할 수 있습니다. 그 부분은 실제로 해결된 문제입니다.
하지만 조정은 데이터 전송 문제가 아닙니다. 이는 금액(총액 vs. 순액), 시점(주문일 vs. 지급일), 범위(이번 주말 주문 vs. 지난주 환불)에 대해 불일치하는 두 데이터 세트 간의 번역 문제입니다. 어떤 플러그인도 주문을 더 빨리 이동시키거나 필드를 더 정확하게 매핑하여 이를 해결할 수 없습니다. 귀하가 잘못 구성한 것도 아니고 플러그인 개발자가 잘못 구성한 것도 아닙니다. 도구는 이해한 문제를 해결했습니다. 귀하가 실제로 가진 문제는 도구의 모델보다 더 큽니다.
작동하는 아키텍처: 계정 정리, 일일 요약, 수수료 라인
해결책은 회계사들이 수십 년 동안 사용해 온 구조를 게이트웨이에 적용하는 것입니다. 세 가지 구성 요소: 게이트웨이당 정산 계정, 주문별 송장 대신 일일 요약, 모든 지급에 대한 명시적인 수수료 라인. 수동 설정 방법을 단계별로 안내합니다.
각 게이트웨이에 대한 정산 계정을 만듭니다. QBO에서 기타 유동 자산 유형의 계정을 “Stripe 정산”으로 추가하고, “PayPal 정산”에 대한 계정을 추가하고, 추가 게이트웨이당 하나씩 추가합니다. 이 계정은 고객이 지불했지만 아직 은행에 입금되지 않은 돈을 나타냅니다. 정확히 그것이 무엇인지입니다.
개별 송장 대신 일일 판매 요약을 게시합니다. 하루에 한 번, 게이트웨이당 하나의 항목을 기록합니다: 총 판매액, 할인, 발행된 환불, 배송 수입, 수집된 판매세. 총 금액에 대해 정산 계정에 차변을 기록하고, 수입, 배송 및 세금 부채 계정에 대변을 기록합니다. 이제 P&L은 일별 수익을 표시합니다. 이는 세금 준비 및 마진 분석에 필요한 모든 것입니다. 96개의 고아 송장 없이 말입니다. (수입 및 세금 계정을 처음부터 설정하는 경우, 저희 WooCommerce 회계 가이드에서 전체 계정과목표 구조를 다룹니다.)
입금될 때 각 지급을 분개로 기록합니다. 지급 총액에 대해 정산 계정에 대변을 기록합니다. 순 입금액에 대해 당좌 예금 계정에 차변을 기록합니다. 수수료 차이에 대해 “판매자 처리 수수료” 비용 계정에 차변을 기록하고, 수입에 대해 환불 취소를 기록합니다. 주말 예시를 사용하면 다음과 같습니다. Stripe 정산 7,200달러에 대변, 당좌 예금 6,782.40달러에 차변, 수수료 237.60달러에 차변, 수익에 대해 180달러의 환불을 기록합니다. 이제 모든 달러에 대한 출처가 명확해집니다.
은행 피드에서 입금을 일치시킵니다. 분개의 은행 라인이 6,782.40달러이고 입금액도 6,782.40달러이므로 QuickBooks는 한 번의 클릭으로 이를 일치시킵니다. 이 순간 전체 구조가 결실을 맺습니다. 조정은 조사가 아닌 확인이 됩니다.
정산 계정 잔액을 확인합니다. 게이트웨이에 현재 처리 중인 금액, 즉 며칠간의 판매액 정도의 금액으로 유지되어야 합니다. 잔액이 꾸준히 증가한다는 것은 수수료나 환불이 어딘가에 기록되지 않고 있다는 것을 의미합니다. 이 단일 숫자는 조기 경고 시스템이며, 훌륭한 CPA가 가장 먼저 확인할 것입니다.
[이미지: 흐름도 — 일일 요약 항목이 Stripe 정산 계정으로 흐르고, 지급 분개가 당좌 예금(순액)과 처리 수수료(비용)로 분리되며, 마지막에 은행 피드 일치가 이루어짐]
수작업으로 처리하면 유능한 회계사가 게이트웨이당 주당 30~60분이 소요되며, 모든 단계에서 오타가 발생할 수 있습니다. 하지만 구조는 올바릅니다 — 그리고 구조는 주문 동기화 플러그인이 제공하지 않는 것입니다.
LedgerPort에서는 이 아키텍처가 설정 페이지입니다
이 다섯 가지 단계가 많은 분개 규율처럼 들린다면, 알아둘 만한 부분은 다음과 같습니다. LedgerPort의 WooCommerce 플러그인에서는 각 구성 요소가 구성으로 존재합니다. 동기화 구성의 결제 탭은 스토어에서 활성화된 모든 결제 게이트웨이를 자동 감지하고 각 게이트웨이에 자체 정산 계정을 할당하며, 구성하지 않은 모든 항목에 대해 기본 정산 계정을 대체로 사용합니다. 게이트웨이당 하나의 정산 계정은 분개 체조가 아니라 게이트웨이당 드롭다운입니다.
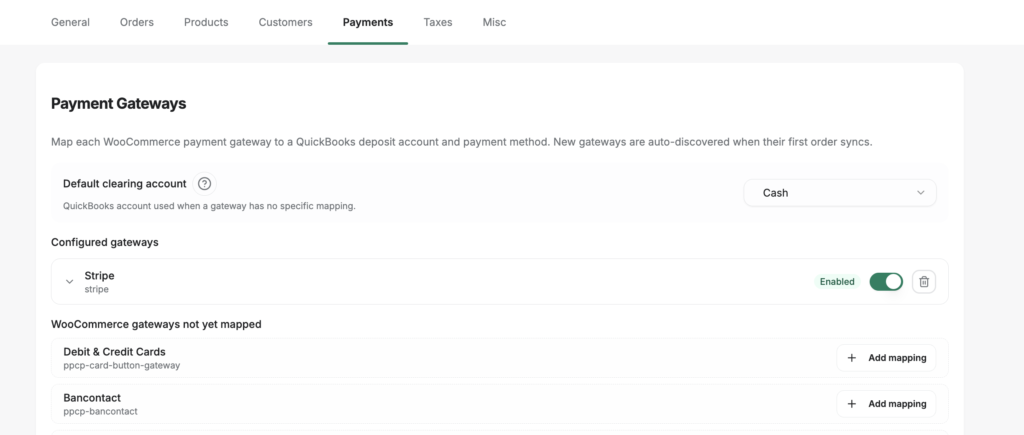
세금도 동일하게 처리됩니다. 판매세는 지정한 QuickBooks 부채 계정으로 게시되고, 반올림 항목은 WooCommerce의 세금 계산과 QuickBooks의 세금 계산 간의 센트 단위 차이를 흡수합니다 — 아무도 경고하지 않는 조정 페이퍼컷입니다. 주문 게시 방식은 또 다른 드롭다운입니다. 결제 완료 주문의 경우 판매 영수증, 나중에 결제가 오는 경우 송장, 견적의 경우 추정치입니다. 동기화 방법의 분류는 플랫폼 일반입니다 — 문서 자체의 지침에 따르면 하루에 약 100건 이상의 주문부터 개별 주문 기록이 장부가 아닌 침전물이 되기 시작하는 지점이며, 이는 일일 요약이 제 역할을 하는 지점입니다.
이 중 어느 것도 구성 프로젝트를 요구하지 않습니다. 문서 자체의 FAQ에 따르면, 모든 탭에는 합리적인 기본값이 제공됩니다 — 대부분의 스토어는 동기화 구성을 전혀 건드리지 않고 동기화를 시작할 수 있으며, 나중에 장부에서 요구하는 대로 설정을 강화할 수 있습니다.
플러그인이 충분할 때 — 그리고 충분하지 않을 때
솔직히 말해서, 때로는 주문 수준 도구가 올바른 선택입니다.
주문 수준 동기화 플러그인이 충분할 가능성이 있는 경우: 대략 월 100~200건 미만의 주문으로 격차를 파악할 수 있는 경우; 간단하고 드물게 환불이 발생하는 단일 게이트웨이를 사용하는 경우; 또는 비즈니스가 송장 중심인 경우 — 도매 및 B2B 스토어로 결제가 특정 고객 송장과 실제로 연결되는 경우입니다. 마지막 경우, 주문별 동기화는 버그가 아니라 요구 사항이며, MyWorks와 같은 도구는 정확히 이를 위해 만들어졌습니다.
마지막 사례에 대한 한 가지 설명입니다. 이 사례는 거꾸로 받아들여지기 때문입니다. 귀하의 스토어가 송장 기반인지 여부는 선택하는 동기화 도구의 속성이 아니라 스토어 계층에서 상류에서 결정됩니다. WooCommerce 스토어는 도매 역할을 할당하고, B2B 가격을 적용하고, 승인된 구매자가 약정으로 결제하도록 허용하는 경우에만 송장 형태의 주문을 내보냅니다. Wholesale Suite가 일반적으로 그렇게 하는 방법입니다. 따라서 기능 목록을 읽기 전에 스토어를 읽으십시오. 넷 약정 주문을 생성하는 경우 지불 인식 일일 요약은 이를 단일 수익 라인으로 쉽게 평탄화하고 AR 세부 정보를 함께 가져갑니다.
결제 인식 계층이 필요한 경우: 여러 게이트웨이를 사용하는 경우(Stripe와 PayPal이 대부분의 스토어가 선을 넘는 지점입니다); 환불 및 분쟁이 매주 발생하는 경우; 주문별 항목이 관리 불가능할 정도로 볼륨이 큰 경우; 또는 CPA가 매월 장부를 마감하고 은행 피드가 일치하기를 기대하는 경우입니다. 그 시점에는 주문 데이터만으로는 조정 가능한 장부를 생성할 수 없습니다 — 아무리 잘 동기화되어도 말입니다.
결제 인식 경로를 고려하고 있다면, 세 가지 실질적인 이의 제기가 다음에 나올 가능성이 높습니다.
“구독 상품도 처리하나요?” LedgerPort는 표준 WooCommerce 주문 및 고객 데이터를 동기화하며, 구독 갱신은 WooCommerce에서 생성할 때 일반 주문으로 들어오므로, 반복 수익이 별도의 설정 없이 동일한 파이프라인을 통해 흐릅니다.
“동기화가 조용히 실패하면 어떻게 되나요?” 실시간 동기화는 WooCommerce 웹훅을 사용하며, WooCommerce는 실패한 전송을 자동으로 재시도합니다. 그래도 누락되는 것이 있다면, wp-admin 내의 수동 동기화 페이지에서 필요에 따라 데이터를 푸시할 수 있으므로, 주문 재전송을 위해 지원팀을 기다릴 필요가 없습니다.
“하나의 계정으로 여러 매장을 운영할 수 있나요?” 네 — 연결된 각 매장은 요금제 제한에 따라 하나의 연결로 계산되며, 연결 페이지에서 확인할 수 있습니다. HPOS 호환성, 자격 증명 저장, 필요한 사용자 역할 등 나머지 실질적인 질문은 WooCommerce용 LedgerPort 시작하기에서 답변됩니다.
엔지니어링 바 동기화 계층은 지워져야 합니다
플러그인 목록에는 절대 표시되지 않는 또 다른 평가 기준이 있습니다. 바로 소프트웨어가 연결될 때 — 그리고 연결을 해제할 때 — 스토어에 어떤 영향을 미치는지입니다. LedgerPort의 프로비저닝은 자동이며 트랜잭션적입니다. 연결 시 읽기 전용 WooCommerce REST API 키가 생성됩니다. 이 키는 스토어를 읽기만 할 뿐 쓰지는 않으며, 주문, 제품, 변형, 고객 및 환불을 다루는 13개의 명명된 웹훅을 등록합니다. 프로비저닝 단계 중 하나라도 실패하면 이미 완료된 모든 단계가 자동으로 롤백되므로 스토어가 절반만 구성된 상태로 방치되지 않습니다.
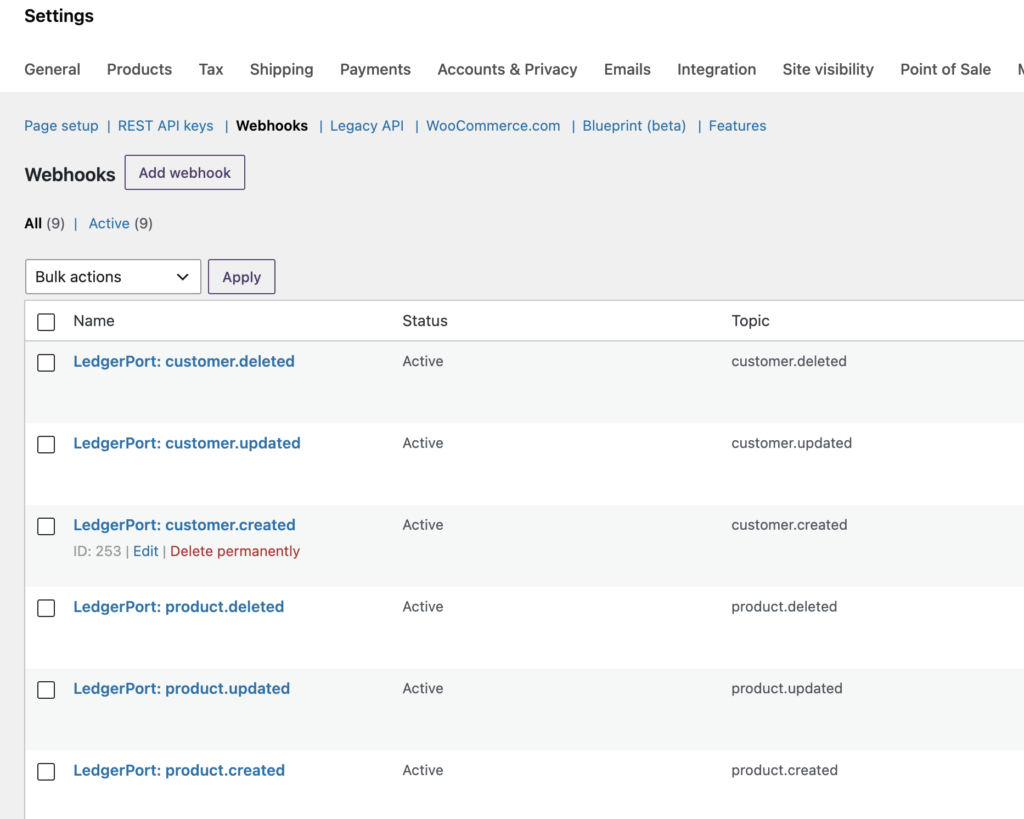
나머지 보안 상태도 마찬가지로 확인 가능합니다. 자격 증명은 사이트 자체의 WordPress 보안 키를 사용하여 AES-256-CBC로 암호화되어 저장되며, 연결 시 manage_woocommerce 권한(관리자 및 상점 관리자)이 필요합니다. LedgerPort는 직접 생성한 웹훅을 건드리지 않습니다. 연결 해제도 마찬가지로 깔끔합니다. 생성한 API 키와 웹훅만 정확히 삭제하며, 스토어와 주문은 그대로 유지되고 매핑은 재연결을 위해 보존됩니다. 처음 시도에서 잘못된 경우 비용이 발생하지 않습니다.
동기화 오류 발생 시에도 동일한 원칙이 적용됩니다. 실패는 조용한 누락이나 PHP 알림이 아니라, 문서화된 수정 방법이 있는 명명된 분류입니다. 예를 들어 만료된 QuickBooks 토큰(문서에서 가장 흔한 동기화 오류로 선정), 매핑되지 않은 제품, 중복 항목, 누락된 필수 필드 등이 있습니다. 각 오류는 원인과 복구 경로를 명시합니다. 기능 체크리스트보다 이것이 "플러그인 하나로 충분하다"의 진정한 경계입니다. 복구 불가능하고 보이지 않는 실패가 시작되는 지점에서 끝납니다.
자동화된 모습
LedgerPort는 해당 지불금 인식 레이어를 기반으로 구축되었으며, WooCommerce와 Shopify를 지원합니다. 스토어와 게이트웨이에 연결한 다음, 일일 요약본을 게이트웨이 정산 계정으로 게시하고, 수수료가 분리된 지불 저널을 생성하며, 은행 거래 내역과 정확히 일치하는 입금액을 자동으로 실행하는 아키텍처를 실행합니다. 설정은 약 15분이 소요되며, 상당한 거래량을 처리하는 스토어는 매주 몇 시간씩 절약할 수 있습니다.
전체 WooCommerce 설정 과정입니다.
플러그인을 설치합니다. WordPress 관리자에서 플러그인 » 새 플러그인 추가로 이동하여 LedgerPort를 검색하고 지금 설치를 클릭한 다음 활성화를 클릭합니다. 사이트에 HTTPS가 필요하며 LedgerPort 계정이 있어야 합니다. 전체 설치 안내에서 두 가지 필수 사항을 모두 다룹니다.
설정 마법사를 실행합니다. 활성화 후 LedgerPort는 마법사를 전체 화면 오버레이로 자동 열립니다. LedgerPort에 연결을 클릭하여 시작하세요.
연결을 승인합니다. app.ledgerport.com으로 리디렉션되어 로그인하고 연결할 비즈니스를 선택한 후 승인을 클릭하면 WordPress 관리자 페이지로 바로 돌아갑니다.
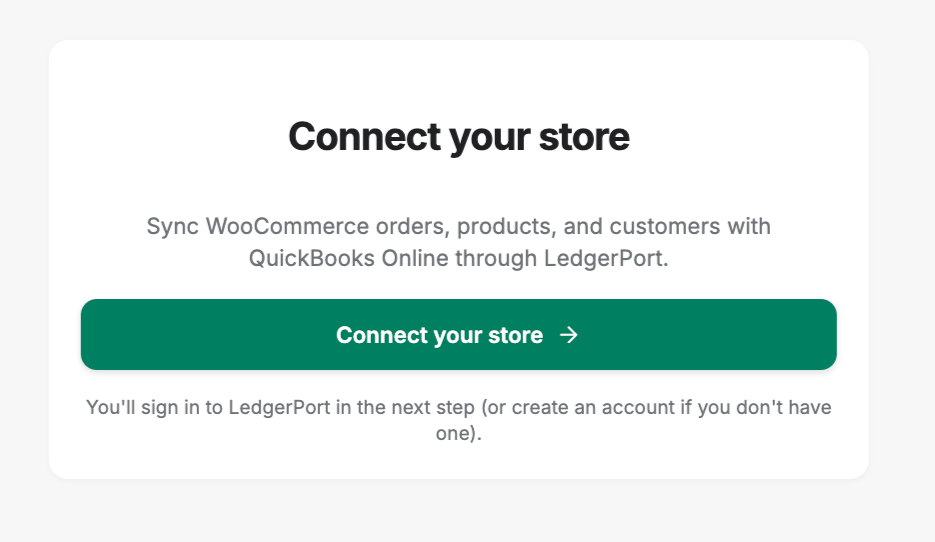
- 프로비저닝을 실행합니다. LedgerPort는 읽기 액세스 권한이 있는 WooCommerce REST API 키를 생성하고, 주문, 환불, 제품 및 고객에 대한 웹훅을 등록하며, 연결을 확인합니다. 단계 중 하나라도 실패하면 모든 것이 자동으로 롤백됩니다. 즉, 부분적으로 구성된 스토어는 없습니다. 성공하면 연결된 LedgerPort 대시보드에 도착합니다.
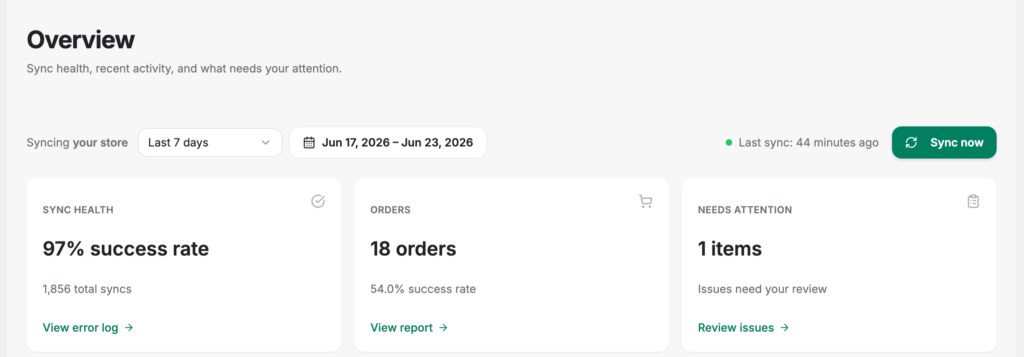
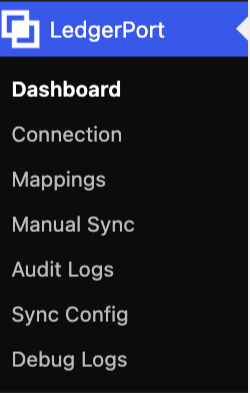
그 후 모든 것은 wp-admin 내의 LedgerPort 메뉴 아래에 있습니다 — 대시보드, 매핑, 수동 동기화, 감사 로그 — 따라서 백엔드를 확인하기 위해 WordPress를 떠날 필요가 없습니다. 그리고 이전 섹션의 정산 계정 구조는 별도의 구성 프로젝트가 아닙니다. 그것은 일일 요약 동기화 방법이며, 다섯 가지 옵션 중 하나로 한 번 선택됩니다.
그리고 웹훅이 실패할 때 — 실패할 것이기 때문입니다
실시간 동기화는 웹훅에 의존하며, 웹훅은 본질적으로 솔직합니다. 즉, 조만간 전달에 실패합니다. 대부분의 무료 플러그인이 답할 수 없는 질문은 다음에 무엇이 일어나는가입니다. 여기서는 답이 여러 단계로 나뉩니다. WooCommerce 자체에서 실패한 웹훅 전달을 자동으로 다시 시도합니다. 그래도 누락된 것은 사라지지 않습니다. wp-admin 내부의 수동 동기화 페이지에서 복구 가능한 레코드별 동기화 상태로 나타납니다.
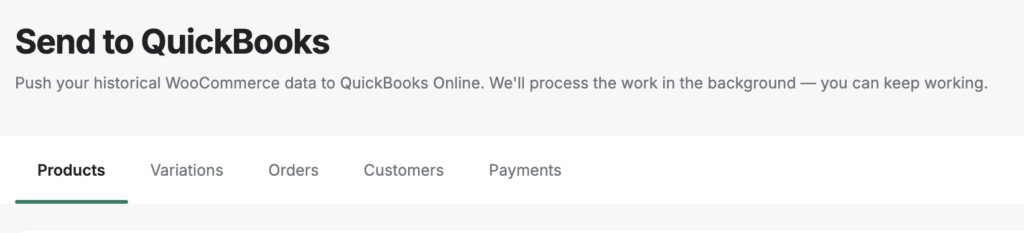
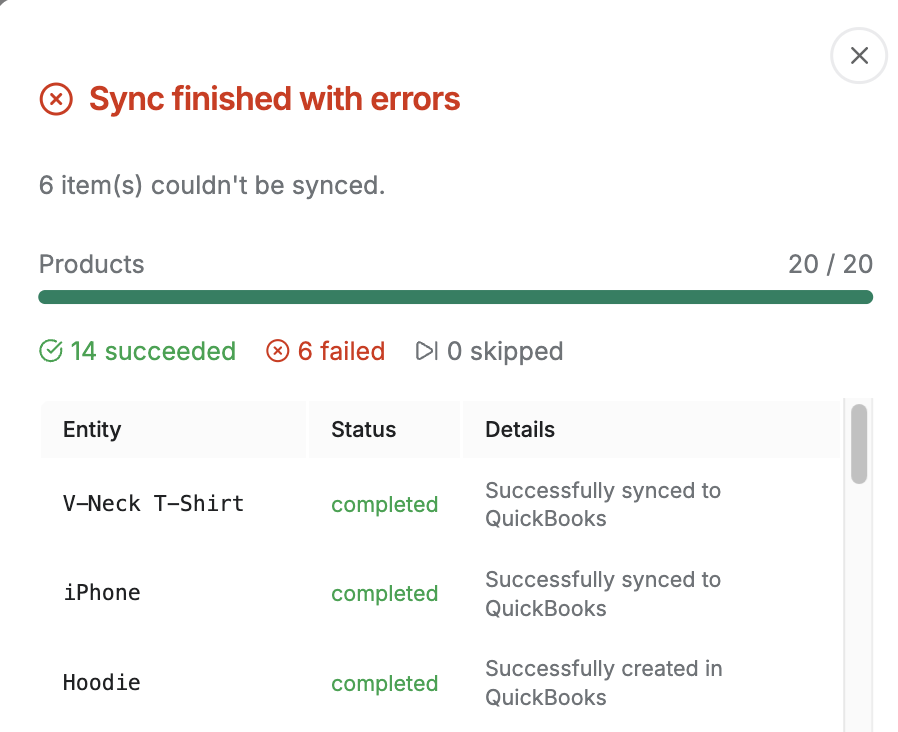
워크플로는 체크박스 선택 후 선택 항목 푸시 또는 전체 푸시를 클릭하고, 각 레코드가 성공하거나 실패하는 라이브 진행률 모달이 표시됩니다. 실패 시 이유가 첨부되며 단순히 빨간색 아이콘만 표시되지 않습니다. 중단 후 복구를 안전하게 만드는 세부 정보: 푸시는 중복되지 않도록 보장됩니다. 이미 동기화된 레코드는 자동으로 건너뛰어지며, 실패한 레코드를 다시 푸시하면 QuickBooks 항목이 두 번 게시되는 대신 생성되거나 업데이트됩니다. 나쁜 한 주 후에 “모든 것을 선택하고 모두 푸시”해도 수익이 두 배로 게시될 수 없습니다.
FAQ에서 여기에 포함될 두 가지 추가 정보가 있습니다. 플러그인은 추가 구성 없이 WooCommerce의 고성능 주문 저장소와 완벽하게 호환되며, 위에서 설명한 대로 WooCommerce 구독 갱신은 일반 주문과 동일한 파이프라인을 통해 처리됩니다. 과거 데이터 백필도 이 페이지를 사용합니다. 즉, “올해 내내 스프레드시트를 사용했습니다”는 데이터 입력 프로젝트가 아니라 가져오기입니다. 연간 데이터를 페이지별로 이동하고, 푸시하고, 상태가 녹색으로 바뀌는 것을 지켜보세요.
거래의 핵심은 간단합니다: LedgerPort는 요약합니다. QBO에서 개별 고객 기록을 동기화하거나 재고를 관리하지 않습니다. 귀하의 비즈니스가 고객별 송장이 필요한 경우 MyWorks와 같은 도구가 더 적합하며, 비교에서 정직하게 설명합니다.
가격은 무료부터 시작합니다 — 월 최대 30개 주문, 스토어 1개, 주문 시 수동 동기화 — 따라서 유료 결제 전에 실제 정산을 확인할 수 있습니다. 성장은 월 25달러부터 시작하며 일일 자동 동기화를 제공합니다. 확장 플랜은 월 67달러부터 시작하며, 실시간 동기화와 함께 이 게시물에서 다루는 정산 저널 및 수수료 처리를 추가합니다. 모든 유료 플랜에는 14일 무조건 환불 보증이 제공됩니다 — 체험판이 아니라 전액 환불, 질문 없습니다.
유연성 세금
WooCommerce에 대한 비극적인 진실은 다음과 같습니다. WooCommerce를 훌륭하게 만드는 것이 귀하의 장부를 망가뜨리는 것입니다.
모든 결제 게이트웨이, 모든 결제 플러그인, 모든 구독 확장 프로그램, 모든 지역 결제 방법을 실행할 수 있으며, 생태계는 이 모든 것을 지원합니다. 그 유연성이 귀하가 플랫폼을 선택한 진정한 이유입니다. 하지만 이는 또한 귀하의 재무 데이터가 동일한 언어를 사용하기로 동의하지 않은 네다섯 개의 시스템에서 발생하며, 회계 계층은 이러한 모든 방언을 상속받는다는 것을 의미합니다.
플러그인 생태계는 이를 구조화해 줄 수 없습니다. 구조는 개방형 생태계가 부과하지 않는 것이기 때문입니다. 따라서 구조는 회계 계층, 즉 정산 계정, 일일 요약, 수수료 라인에 존재해야 합니다. 이는 다른 모든 곳에서의 유연성에 대한 대가이며, 주문 동기화가 이를 대신 지불할 것이라고 기대하지 않는다면 공정한 가격입니다.
시작 시 발생한 1,400개의 송장은 잘못되지 않았습니다. 단지 은행이 묻지 않은 질문에 답했을 뿐입니다. 귀하의 장부가 올바른 질문에 답하도록 하려면 WooCommerce 스토어를 LedgerPort에 연결하세요. 무료 요금제는 첫 지급을 포함하며, 입금이 일치하는 순간 아키텍처가 작동함을 알게 될 것입니다.