


- 1Die fünf Mängel in fast jeder Shopify-Kundendatei
- 21. Doppelt gezählte Einnahmen (Bank-Feed + synchronisierte Verkäufe)
- 32. Netto-Einzahlungserträge (Gebühren sind unsichtbar)
- 43. Umsatzsteuer als Einnahme verbucht
- 54. Rückerstattungen gelöscht oder verrechnet statt als Gegenertrag
- 65. Das Verrechnungskonto, das nie auf Null gesetzt wurde
- 7Die Bereinigungssequenz: Bereinigen Sie eine Shopify-QuickBooks-Datei in dieser Reihenfolge
- 8Der Wiederaufbau: Damit sich das Chaos nie wieder ansammelt
- 9Umfang und Preisgestaltung des Auftrags
- 10Die fünfte Bereinigung ist eine Checkliste
Das Chaos in dieser Datei ist nicht einzigartig. Es sind dieselben fünf Mängel, die Sie in der nächsten finden werden – das bedeutet, Sie können aufhören, Bereinigungen als forensische Projekte zu behandeln, und sie stattdessen als Standardauftrag behandeln.
Sie haben zehn Stunden angeboten. Es ist Woche drei.
Die Datei kam Mitte des Jahres von einem Shopify-Kunden zu Ihnen, dessen letzter Buchhalter "mit dem Bank-Feed Schritt gehalten hat". Was er auch tat – jede Einzahlung wurde direkt als Einnahme kategorisiert. Das Problem ist, dass irgendwann auch ein Synchronisationstool angeschlossen wurde, sodass Verkaufsbelege Einnahmen zusätzlich zu den Einzahlungen verbuchen. Die Einnahmen werden monatelang doppelt gezählt. Verarbeitungsgebühren erscheinen nirgends. Die Umsatzsteuer befindet sich in einem Einnahmenkonto. Und es gibt ein Verrechnungskonto mit einem fünfstelligen Saldo, das noch nie auf Null gesetzt wurde.
Jeder Steuerberater, der zugestimmt hat, die QuickBooks-Datei eines Shopify-Kunden zu bereinigen, hat eine Version davon erlebt. Und die meisten gehen mit der gleichen Überzeugung daraus hervor: *Jede E-Commerce-Bereinigung ist ein maßgeschneidertes forensisches Projekt – man muss sich einfach durchbeißen.*
Das ist die Lüge, und sie ist teuer. Deshalb wurde das Zehn-Stunden-Angebot zu dreißig, und deshalb hören viele Kanzleien leise auf, E-Commerce-Empfehlungen anzunehmen.
Das hier verschleiert der Aufwand: Die Probleme von Shopify-Kunden sind äußerst konsistent. Dieselben fünf Mängel treten in fast jeder Datei auf, ungefähr in der gleichen Reihenfolge der Schwere, verursacht durch dieselben wenigen Einrichtungsfehler. Sobald Sie sie benennen, in wenigen Minuten erkennen und in der richtigen Reihenfolge beheben können, wird aus dem forensischen Projekt ein Standardauftrag – einer, den Sie umreißen, bepreisen und schließlich delegieren können.
Die fünf Mängel in fast jeder Shopify-Kundendatei
Bevor Sie eine einzige Transaktion anfassen, diagnostizieren Sie. Jede dieser Diagnosen dauert nur wenige Minuten, und zusammen sagen sie Ihnen, womit Sie es tatsächlich zu tun haben.
| Mangel | Fünf-Minuten-Erkennung | Was es korrumpiert |
|---|---|---|
| Doppelt gezählte Einnahmen | GuV-Umsatz vs. Shopify-Bruttoumsatz – Abweichung etwa um das 2-fache | Umsatz, Steuerschuld |
| Netto-Einzahlungserträge | Umsatz entspricht exakt den Bankeinzahlungen; Gebührenkonten leer | Bruttoumsatz, Margen, Gebührenaufwand |
| Umsatzsteuer in Einnahmen | Keine Aktivität in einem Umsatzsteuerverbindlichkeitskonto | Umsatzerlöse, Verbindlichkeiten, Unterstützung bei der Einreichung |
| Rückerstattungen gelöscht oder verrechnet | Gegenläufiges Erlöskonto leer trotz Rückerstattungen in Shopify | Bruttoumsatzerlöse, Retourenquote |
| Verrechnung nie auf Null gesetzt | Hoher, veralteter Saldo auf dem Verrechnungskonto | Alles nachgelagert – nichts stimmt überein |
1. Doppelt gezählte Einnahmen (Bank-Feed + synchronisierte Verkäufe)
Erkennen Sie es: Ziehen Sie die Gewinn- und Verlustrechnung (GuV) heran und vergleichen Sie die Gesamteinnahmen mit dem Shopify-Verkaufsbericht des Kunden für denselben Zeitraum. Wenn die Bücher ungefähr das Doppelte der Bruttoumsätze der Plattform ausweisen, haben Sie es gefunden. Bestätigen Sie dies, indem Sie ein beliebiges Ertragskonto öffnen: Sie sehen Bankeinzahlungen und Verkaufsbelege (oder Rechnungen) von einem Synchronisationstool, die nebeneinander gebucht werden.
Was es beschädigt: Umsatzerlöse und damit alles, was daraus berechnet wird – geschätzte Steuern, Margen, jede Kreditanfrage, die der Kunde mit diesen Zahlen gestellt hat.
Die Lösung: Die Verkaufsbelege sind normalerweise die besseren Aufzeichnungen – sie enthalten Details zu den Bruttoumsätzen. Behalten Sie diese und ordnen Sie die Bankeinzahlungen aus den Erträgen um und gegen das Verrechnungskonto, über das die Belege abgewickelt werden sollten. Für bereits eingereichte Zeiträume nicht Zeile für Zeile neu aufführen; buchen Sie pro Zeitraum einen berichtigenden Journal-Eintrag (Soll Erträge, Haben Verrechnungskonto) und dokumentieren Sie ihn.
2. Netto-Einzahlungserträge (Gebühren sind unsichtbar)
Erkennen Sie es: Wenn die Einnahmen *nicht* verdoppelt sind, prüfen Sie, ob sie stattdessen zu niedrig ausgewiesen sind. Wenn die Erträge den Bankeinzahlungen bis auf den Cent entsprechen, hat der Kunde die Nettoauszahlungen von Shopify als Umsätze verbucht. Bestätigen Sie dies, indem Sie nach einem Konto für Händlergebühren oder Verarbeitungsgebühren suchen – es wird leer sein oder ganz fehlen.
Was es beschädigt: Bruttoumsatzerlöse sind zu niedrig ausgewiesen, Gebührenaufwand existiert nicht und die Margenanalyse ist eine Fiktion. Ein Geschäft, das 2,9 % + 0,30 $ pro Bestellung zahlt, hat eine tatsächliche Kostenposition, die noch nie in einer GuV aufgetaucht ist.
Die Lösung: Brutto ausweisen. Für jeden Zeitraum stellt ein Journal-Eintrag mit Soll auf Händlergebühren und Haben auf Umsatzerlöse für den Gebührenbetrag beide Positionen wieder her. Die Auszahlungsberichte von Shopify liefern Ihnen die Gebührensummen pro Auszahlung; arbeiten Sie damit, nicht mit Schätzungen.
3. Umsatzsteuer als Einnahme verbucht
Erkennen Sie es: Öffnen Sie die Umsatzsteuerverbindlichkeitskonten. Wenn wenig oder keine Aktivität vorhanden ist – aber der Kunde eingereicht und abgeführt hat – sitzt die erhobene Steuer im Ertrag. Oft finden Sie auch das Spiegelbild: Überweisungen an den Staat, die als „Umsatzsteueraufwand“ verbucht werden. Die beiden heben sich in der GuV ungefähr auf, weshalb niemand etwas bemerkt hat. Beide Positionen sind falsch.
Was es beschädigt: Die Erträge sind um die erhobene Steuer überhöht, das Verbindlichkeitskonto kann nicht das unterstützen, was eingereicht wurde, und wenn der Kunde jemals geprüft wird, werden die Bücher und die Steuererklärungen nicht übereinstimmen.
Die Lösung: Klassifizieren Sie die erhobene Steuer aus den Erträgen in das Verbindlichkeitskonto um und buchen Sie dann die Überweisungen gegen diese Verbindlichkeit anstatt gegen Aufwand.gleichen Sie den resultierenden Saldo mit den tatsächlichen Einreichungen des Kunden ab – dies ist der einzige Mangel, bei dem Sie eine Quelle außerhalb von QuickBooks vollständig überprüfen sollten.
4. Rückerstattungen gelöscht oder verrechnet statt als Gegenertrag
Erkennen: Ziehen Sie den Shopify-Retourenbericht für den Zeitraum. Suchen Sie dann nach einem Konto für Rückerstattungen und Gutschriften (Contra-Umsatz). Wenn Shopify Rückerstattungen anzeigt und die Bücher nichts zeigen, wurden die Rückerstattungen entweder stillschweigend in Einzahlungen verrechnet oder – prüfen Sie das Audit-Protokoll – endgültig gelöscht, als sie „nichts übereinstimmten“.
Was es beschädigt: Bruttoumsatz und die Retourenquote. Ein Kunde, der glaubt, 2 % des Umsatzes zurückzugeben, tatsächlich aber 6 % zurückgibt, trifft Preis- und Lagerentscheidungen auf Basis falscher Daten.
Die Behebung: Buchen Sie Rückerstattungen auf ein Contra-Umsatz-Konto um, damit Bruttoumsatz, Rückerstattungen und Nettoumsatz jeweils als sichtbare Posten erhalten bleiben. Verrechnen Sie sie niemals mit dem Umsatz – die dort zerstörten Informationen kommen nicht zurück.
5. Das Verrechnungskonto, das nie auf Null gesetzt wurde
Erkennen: Betrachten Sie den Saldo. Ein Shopify-Clearing-Konto (oder nicht eingezahlte Gelder) sollte zwischen den Auszahlungen nahe Null liegen. Wenn es einen fünfstelligen Saldo aufweist, der Monate alt ist, hat noch nie jemand die eingehenden Beträge mit den ausgehenden abgeglichen.
Was es beschädigt: Dies ist der Fehler, der die anderen unsichtbar macht. Wenn das Clearing nie auf Null gesetzt wird, gibt es keinen Kontrollpunkt, der die doppelte Zählung oder die fehlenden Gebühren aufgedeckt hätte. Nichts nachgelagert stimmt überein, und niemand kann sagen, wann die Datei zuletzt nachweislich korrekt war.
Die Behebung: Dieser Schritt kommt bewusst zuletzt. Sobald die Fehler eins bis vier behoben sind, altern Sie den Clearing-Saldo, gleichen Sie Auszahlungen mit Einzahlungen ab und schreiben Sie den dokumentierten Restbetrag mit einem Buchungssatz ab, den der Partner genehmigt. Wenn Sie versuchen, das Clearing zuerst auf Null zu setzen, gleichen Sie gegen Zahlen ab, die immer noch falsch sind.
Die Bereinigungssequenz: Bereinigen Sie eine Shopify-QuickBooks-Datei in dieser Reihenfolge
Die Reihenfolge ist wichtiger als die Anstrengung. Hier ist die Sequenz und warum.
1. Stoppen Sie den Zufluss. Bevor Sie etwas beheben, pausieren Sie alles, was noch Duplikate bucht – trennen Sie die redundanten Regeln für die Bankkategorisierung oder die falsch konfigurierte Synchronisierung. Eine Datei zu bereinigen, die immer noch Fehler ansammelt, ist wie Wischen bei laufendem Wasserhahn.
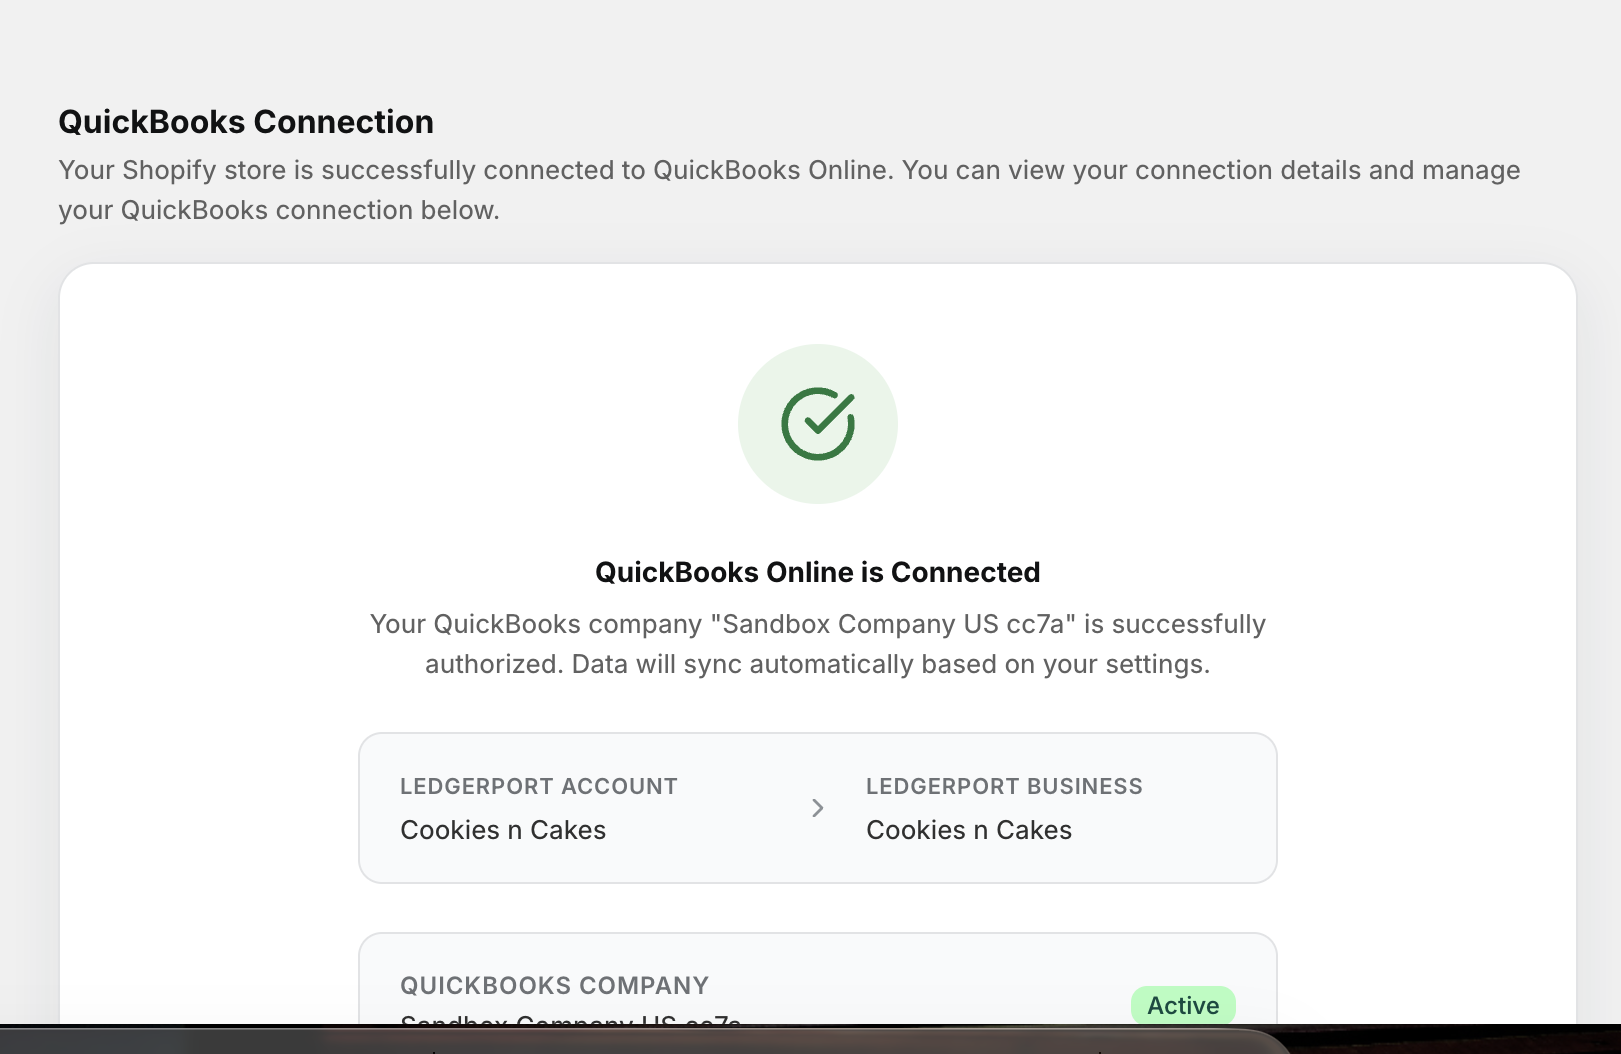
Wenn das Synchronisierungstool des Kunden LedgerPort ist, hat der Wasserhahn einen buchstäblichen Griff: Synchronisierung pausieren auf der Seite Verbindungen. Es stoppt die Landung neuer Einträge in QuickBooks mitten in der Bereinigung, ohne etwas zu trennen oder die Konfiguration zu verlieren – die Dokumentation empfiehlt es genau für diese Art von Wartungsfenster. Wenn die Datei sauber ist, klicken Sie auf Synchronisierung fortsetzen an derselben Stelle, und die Verbindung macht dort weiter, wo sie aufgehört hat. Keine erneute Autorisierung, keine neu erstellten Einstellungen, keine verwaisten Zuordnungen.
2. Korrigieren Sie die Struktur vor der Historie. Richten Sie den Kontenplan ein, den die Datei haben sollte – Einnahmen, Rückerstattungen contra, Gebühren, Umsatzsteuerschuld, ein Verrechnungskonto. Korrekturen, die in einen fehlerhaften Plan gebucht werden, erzeugen nur eine zweite Generation von Unordnung. Die Vorlage für den Kontenplan im E-Commerce ist die Standardzuordnung; passen Sie sie pro Kunde an, aber beginnen Sie mit dem Standard.
3. Ziehen Sie die Restatement-Linie. Entscheiden Sie, wie weit zurück Sie im Detail restaten und wie viel Sie zusammenfassend anpassen. Ein funktionierender Standard: Das aktuelle Geschäftsjahr wird auf Transaktions- oder Monatsjournal-Ebene korrigiert; frühere eingereichte Jahre erhalten jeweils einen Anpassungseintrag, koordiniert mit demjenigen, der die Erklärungen vorbereitet hat. Materialität und der Steuerberater treffen diese Entscheidung – nicht Ihr Appetit auf Archäologie.
4. Arbeiten Sie nach Mangel, nicht nach Monat. Dies ist der mit Abstand größte Effizienzgewinn im gesamten Engagement. Räumen Sie nicht "erst den Januar, dann den Februar auf". Beheben Sie alle doppelt gezählten Einzahlungen im gesamten Zeitraum, dann alle Gebührenbruttobeträge, dann die Steuerklassenänderungen, dann die Rückerstattungen. Jeder Mangel hat eine Diagnose und ein Korrekturmuster – die Bündelung verwandelt dreißig Ermessensentscheidungen in eine Ermessensentscheidung, die dreißigmal angewendet wird.
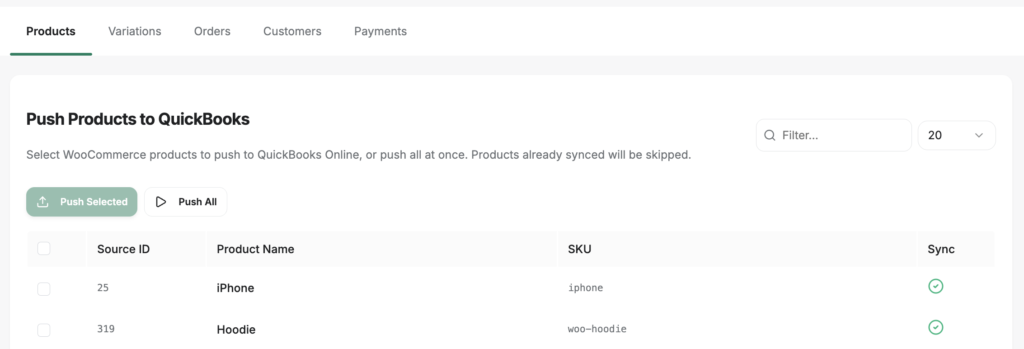
Irgendwo in diesem Durchgang finden Sie auch Bestellungen, die überhaupt nicht gebucht wurden – sie sind aufgrund eines nicht zugeordneten Produkts oder eines fehlenden Abrechnungsfeldes aus der Synchronisierung ausgefallen und verbleiben seitdem im Fehlerstatus, was Lücken in den Einnahmen hinterlässt. Holen Sie sie im gleichen Bündelungsgeist zurück: Filtern Sie die Bestellliste nach Status, beheben Sie die Ursache, wählen Sie dann die fehlgeschlagenen Datensätze auf der Seite "Manuelle Synchronisierung" aus und klicken Sie auf "Ausgewählte synchronisieren". Eine Regel, bevor Sie etwas erneut hochladen: Das erneute Synchronisieren einer Bestellung, die bereits synchronisiert wurde, erstellt eine neue QuickBooks-Transaktion, keine Aktualisierung. Wenn das fehlerhafte Original noch in der Datei vorhanden ist, löschen Sie es zuerst in QuickBooks – andernfalls erstellt der erneute Import den Mangel Nr. 1, doppelt gezählte Einnahmen, mitten in Ihrer eigenen Bereinigung neu. Pause, Struktur bereinigen, Zuordnungen korrigieren, fehlerhafte Originale löschen, erneut synchronisieren, fortfahren. Die Reihenfolge ist das Engagement.
5. Nullstellen Sie das Verrechnungskonto zuletzt. Es ist Ihr Nachweis der Vollständigkeit. Wenn die Verrechnung bei jedem Auszahlungsdatum auf Null abgeglichen wird, ist die Datei nachweislich sauber – und Sie haben die Beweise, die Sie dem Kunden zeigen können.
Der Wiederaufbau: Damit sich das Chaos nie wieder ansammelt
Eine Bereinigung, die mit "und jetzt machen Sie das manuell weiter" endet, ist nicht abgeschlossen. Die gleichen fünf Mängel werden wieder auftreten, weil sie nicht durch Nachlässigkeit verursacht wurden – sie wurden durch das Fehlen einer Struktur verursacht, die die Auszahlungsberechnung von Shopify korrekt in QuickBooks übersetzt. (Wenn Sie die vollständige Anatomie dessen erfahren möchten, was diese Übersetzung beinhaltet, wird Aufzeichnung von Shopify-Verkäufen in QuickBooks Schritt für Schritt durchlaufen.)
Der Wiederaufbau hat drei Teile.
Konfigurieren Sie die Synchronisierung pro Kunde, nicht pro Standard. Die erste Konfigurationsentscheidung beim Neuerstellen ist die Synchronisierungsmethode – pro Kunde ausgewählt unter Sync Config » Orders. Daily Summary postet einen Journaleintrag pro Tag, der alle Bestellungen dieses Tages zusammenfasst: die richtige Form für Kunden mit hohem Volumen und eine Datei, die sowieso mit Ihren Gesamtergebnissen übereinstimmt. Der Modus Invoice passt für B2B-Kunden, die offene Forderungen benötigen – er erstellt die Rechnung bei Auftragserteilung und einen Zahlungsdatensatz, wenn die Bestellung bezahlt wird. Die Tag-Based-Weiterleitung verarbeitet gemischte Bücher: Tag wholesale → Invoice, retail → Sales Receipt und ein Tag do-not-sync hält Test- und interne Bestellungen vollständig aus QuickBooks heraus.
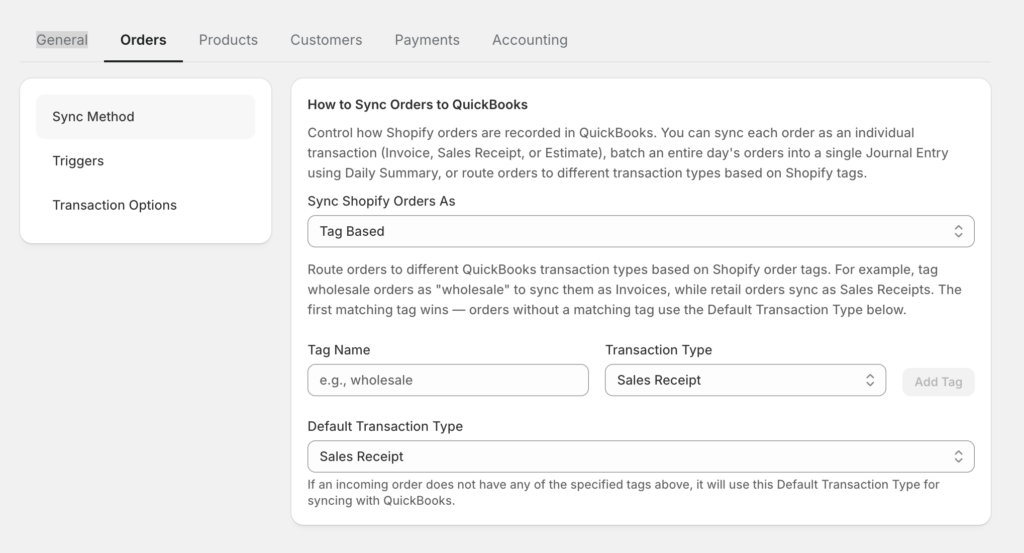
Kombinieren Sie die Methode mit Trigger-Hygiene. Setzen Sie den Zahlungstrigger nur auf Paid und lassen Sie stornierte Bestellungen ausgeschlossen – der Standard – und ausstehende, autorisierte, aber nie abgebuchte und stornierte Bestellungen können die Datei nie wieder verunreinigen. Das ist die strukturelle Korrektur für den Phantomumsatz, den Sie gerade in Schritt vier entfernt haben. Setzen Sie dann die beiden Leitplanken, die den bereinigten Zeitraum schützen: Die Datums- und Bestell-ID-Grenzwerte "nicht vorab synchronisieren" verhindern, dass die Synchronisierung die gerade korrigierte Historie erneut importiert, und jede Konfigurationsänderung gilt nur für zukünftige Synchronisierungen – gebuchte Transaktionen werden nie rückwirkend neu geschrieben. (Die Grenzwerte befinden sich in der Synchronisierungskonfiguration des WooCommerce-Plugins; die Shopify-App bietet die gleichen reinen Vorwärts-Synchronisierungskonzepte.) Fehlervermeidung als Konfiguration, ein Bildschirm pro Kunde.
Eine Standard-Chart-Zuordnung. Diejenige, die Sie in Schritt zwei erstellt haben, ist nicht nur für diesen Kunden. Erstellen Sie eine Vorlage. Die Variation zwischen Shopify-Kunden liegt fast ausschließlich in den Zuordnungsdetails und dem historischen Fenster – die Struktur ist von Datei zu Datei gleich.

Automatisierte Auszahlungsjournale. Die dauerhafte Lösung ist eine Synchronisierungsschicht, die jede Auszahlung als Journaleintrag bucht – Bruttoumsatz, Rückerstattungen, Gebühren und Umsatzsteuer jeweils auf ihre zugeordneten Konten – und sie gegen die Bankeinzahlung verrechnet. Dieser einzelne Mechanismus verhindert strukturell alle fünf Mängel: Einkommen kann nicht doppelt gezählt werden, Gebühren können nicht verschwinden, Steuern können nicht im Umsatz verbleiben, Rückerstattungen werden als Gegenumsatz gebucht und die Verrechnung ergibt bei jeder Auszahlung Null.
Dies ist die Ebene, auf der ein Tool wie LedgerPort sitzt. Es verbindet den Shopify-Store des Kunden mit QuickBooks Online, wendet Ihre Kontenzuordnung an und bucht Auszahlungsjournale automatisch – mit Zugriff für Steuerberater, sodass Ihre Kanzlei die Zuordnung für jede Mandantendatei steuert, anstatt zu hoffen, dass die Einrichtung jedes Mandanten Ihren Standards entspricht. Eine ehrliche Einschränkung: Kein Synchronisationstool repariert die Historie von selbst rückwirkend. Aber für das in Schritt drei definierte Restatement-Fenster ist das Zurückfüllen korrekt strukturierter Einträge und das Löschen fehlerhafter Einträge oft schneller, als monatlich Korrekturjournale zu erstellen.
[BILD: Diagramm – eine Shopify-Auszahlung, die sich in Bruttoumsatz-, Rückerstattungs-, Gebühren- und Umsatzsteuerverbindlichkeitszeilen in einem Journal-Eintrag aufteilt und zum Bankeinzahlungsgutschrift verrechnet wird]
Umfang und Preisgestaltung des Auftrags
Sobald der Prozess eine Abfolge statt einer Ausgrabung ist, können Sie ihn auch so bepreisen. Diagnose mit der Fünf-Fehler-Checkliste vor dem Angebot – es dauert weniger als eine Stunde und gibt Ihnen das Restatement-Fenster und das involvierte Volumen an. Bieten Sie dann einen Festpreis an: Bereinigung als festes Projekt, die neu erstellte Synchronisation als Beginn eines monatlichen Auftrags. Kanzleien, die dies standardisieren, hören auf, Überstunden zu fressen, und beginnen, für die Expertise statt für die Stunden abzurechnen – die gleiche Margenlogik, die auf der LedgerPort für Steuerberater-Seite behandelt wird, die einen Blick wert ist, bevor Sie Ihr nächstes Angebot erstellen.
Es gibt ein Programm, das genau auf dieses Engagementmodell zugeschnitten ist. Das LedgerPort CPA Partner Program bietet Kanzleien hierarchisches Kundenmanagement – jede Mandantendatei wird von einem einzigen Dashboard aus überwacht und konfiguriert, ohne sich aus separaten Konten ein- und ausloggen zu müssen – plus Großhandelsabrechnung pro Mandant, die mit dem Volumen skaliert, und die Wahl zwischen einer Umsatzbeteiligung von 20 % und der Weitergabe eines Rabatts von 20 % an die Kunden. Das Angebot, schlicht gesagt: ein Login, so viele Mandantengeschäfte, wie Sie verwalten, sowohl Shopify- als auch WooCommerce-Stores, jeder synchronisiert mit seiner eigenen QuickBooks-Datei.
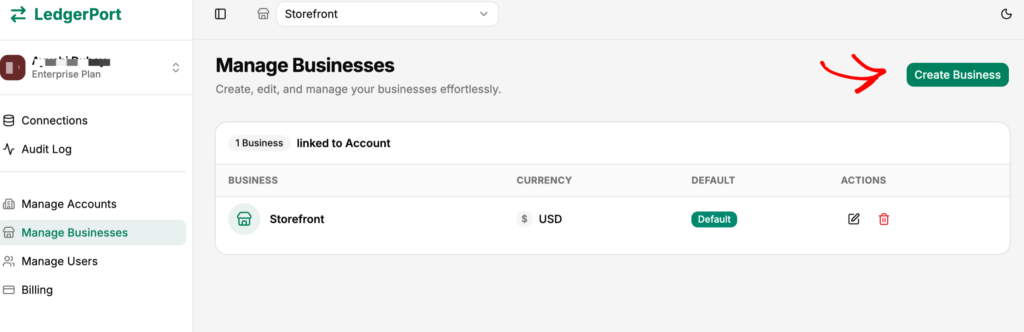
Was die Lieferökonomie jedoch wirklich verändert, ist das Tooling rund um den Wiederaufbau selbst. Die in Schritt zwei erstellte Standard-Kontenplanzuordnung wird zu einer Master-Vorlage – einer standardisierten Kontenplan-Konfiguration, die für jeden Kunden angewendet wird, sodass Sie einmal eine Vorlage erstellen und pro Kunde stempeln, anstatt die Zuordnung für jedes Engagement von Grund auf neu zu erstellen. Das ist der Mechanismus hinter der pauschalen Angebotserstellung mit gerader Miene. White-glove-Onboarding nimmt Ihnen die Einrichtung komplett ab: Das LedgerPort-Team verbindet das Geschäft und das QuickBooks-Konto jedes Kunden, richtet die Zuordnungen ein und verifiziert, dass die ersten Synchronisierungen vollständig abgeglichen sind, bevor das Engagement zurückgegeben wird – sodass die Einrichtung von Kunde Nr. 7 nicht Ihre unbezahlten Stunden sind. Und wenn ein Engagement eine Buchbereinigung beinhaltet, importiert Time Machine bis zu 24 Monate historische Shopify-Bestelldaten. Die Statistik, die den Retainer bepreist: Partnerfirmen sparen durchschnittlich 12+ Stunden pro Kunde und Monat bei der Abstimmung – das ist die Zahl, die hinter der monatlichen Gebühr zusätzlich zum Bereinigungsprojekt steht.
Die fünfte Bereinigung ist eine Checkliste
So sieht das in der Praxis aus. Ihre erste Bereinigung mit diesem Prozess tut immer noch weh, weil Sie die Vorlagen während der Erstellung erstellen. Die zweite dauert halb so lange – die gleichen fünf Mängel, und dieses Mal erkennen Sie sie allein anhand der Summen- und Saldenliste. Bei der fünften ist es eine Checkliste, die ein Junior-Mitarbeiter abarbeitet: Diagnose, Stapeln der Korrekturen nach Mangel, Nullsetzen des Verrechnungskontos, dem Partner einen Ausgleichseintrag zur Überprüfung übergeben.
Der Kunde, der als Bedauern in der dritten Woche ankam, wird zum Engagement-Typ, den Ihre Firma am zuversichtlichsten anbietet. Nicht, weil die Dateien sauberer wurden. Weil Sie aufgehört haben zu glauben, dass jeder einzelne einzigartig war.
Wenn Sie eine Datei mit doppelt erfassten Einnahmen und einem Verrechnungskonto, das nie Null gesehen hat, vor sich haben, führen Sie diese Woche die Fünf-Mängel-Diagnose durch – und schauen Sie dann, wie Firmen die Wiederaufbauschicht einrichten, damit dies die letzte Bereinigung ist, die dieser Kunde jemals benötigt. Und wenn Sie bereit sind, das Onboarding für Ihre E-Commerce-Kunden zu standardisieren, beginnen Sie mit der CPA-Onboarding-Anleitung – wir werden die erste Zuordnung mit Ihnen durchgehen.
Verwandt: Kontenplan für E-Commerce · So verbuchen Sie Shopify-Verkäufe in QuickBooks Online