

- 1Two Ways to Connect Shopify and QuickBooks Online
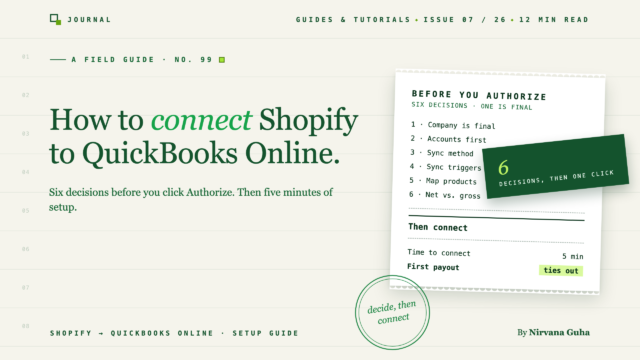
- 2Six Decisions to Make Before You Connect
- 31. Which QuickBooks company you connect
- 42. Your chart of accounts, set up first
- 53. Your sync method
- 64. When orders sync: triggers and start date
- 75. Product mapping, and the fallback trade-off
- 86. Payouts: net vs. gross
- 9The six decisions at a glance
- 10How to Connect Shopify to QuickBooks Online, Step by Step
- 11Path A: Start from the Shopify App Store
- 12Path B: Start from the LedgerPort dashboard
- 13Finish the setup checklist
- 14Your First Week: Verify Before You Trust It
- 15FAQ
- 16Can I connect more than one Shopify store?
- 17What happens if I disconnect?
- 18Does this work with QuickBooks Desktop?
- 19Now You Know What You're Authorizing
The connection takes five minutes. The decisions before it are what your accountant will notice.
You're one click away. A QuickBooks window is open in front of you with a list of companies and an Authorize button.
The most important sentence in the whole setup isn't on that screen. It's a warning in the setup guide that most people skim past: once you connect a QuickBooks company to a LedgerPort Business, you can't switch it to a different one later. People click Authorize without a second thought, because the job feels like "get the two apps talking," and Authorize is the last step of that job.
Here's how that tends to go. You searched this exact phrase last spring, installed the first app Google showed you, clicked Authorize, and saw a green "Connected." Six weeks later your accountant called. March revenue in QuickBooks was higher than every Shopify deposit in the bank combined. There was a new customer record for every single order. And 40 orders were sitting in an error queue because their products had never been mapped. Undoing it took longer than doing the books by hand would have.
Nothing was broken. The connection worked perfectly. That's the problem with the most common belief about this setup: once it says Connected, the books take care of themselves.
They don't. Connecting Shopify to QuickBooks Online takes about five minutes and is the least important part of the job. Six decisions made before you click Authorize decide what your books actually say. One of them can't be undone. The rest can be changed, but only going forward: orders that already synced keep the shape they synced in.
So this guide is in a deliberate order. First, the two ways to connect. Then the six decisions. Then the click-by-click setup, and a first-week routine to prove it's working.
Two Ways to Connect Shopify and QuickBooks Online
There are two kinds of Shopify QuickBooks integration, and both are legitimate.
Intuit's free connector. Intuit publishes its own Shopify connector. It's official, it's free, and it installs in minutes. For a single store at modest volume with simple retail orders, it's a sensible choice, and we've said so in our honest review of the free QuickBooks Shopify connector. Its center of gravity is importing sales. Where it gets thin is fee breakdown, payout reconciliation and error visibility, and those gaps grow with volume. If you're already on it and feeling those gaps, read what outgrowing the free connector looks like before you switch.
A dedicated sync app. This category includes LedgerPort, A2X, Synder, MyWorks and Webgility, and each one is strong at different jobs. You choose this route when you need control over how orders post. That covers picking the transaction type, mapping individual fees, handling refunds, breaking payouts into their parts, or running more than one store. This guide uses LedgerPort as the worked example because we can show you its real screens. The six decisions apply to any tool in the category, though.
One scope note before we go on: this guide is QuickBooks Online-only. LedgerPort doesn't support QuickBooks Desktop. If you're on Desktop, start with your Shopify and QuickBooks Desktop options instead.
Six Decisions to Make Before You Connect
Each decision below covers what it controls, the safe default, and when to choose something else. Five of them can be revisited later. The first can't.
1. Which QuickBooks company you connect
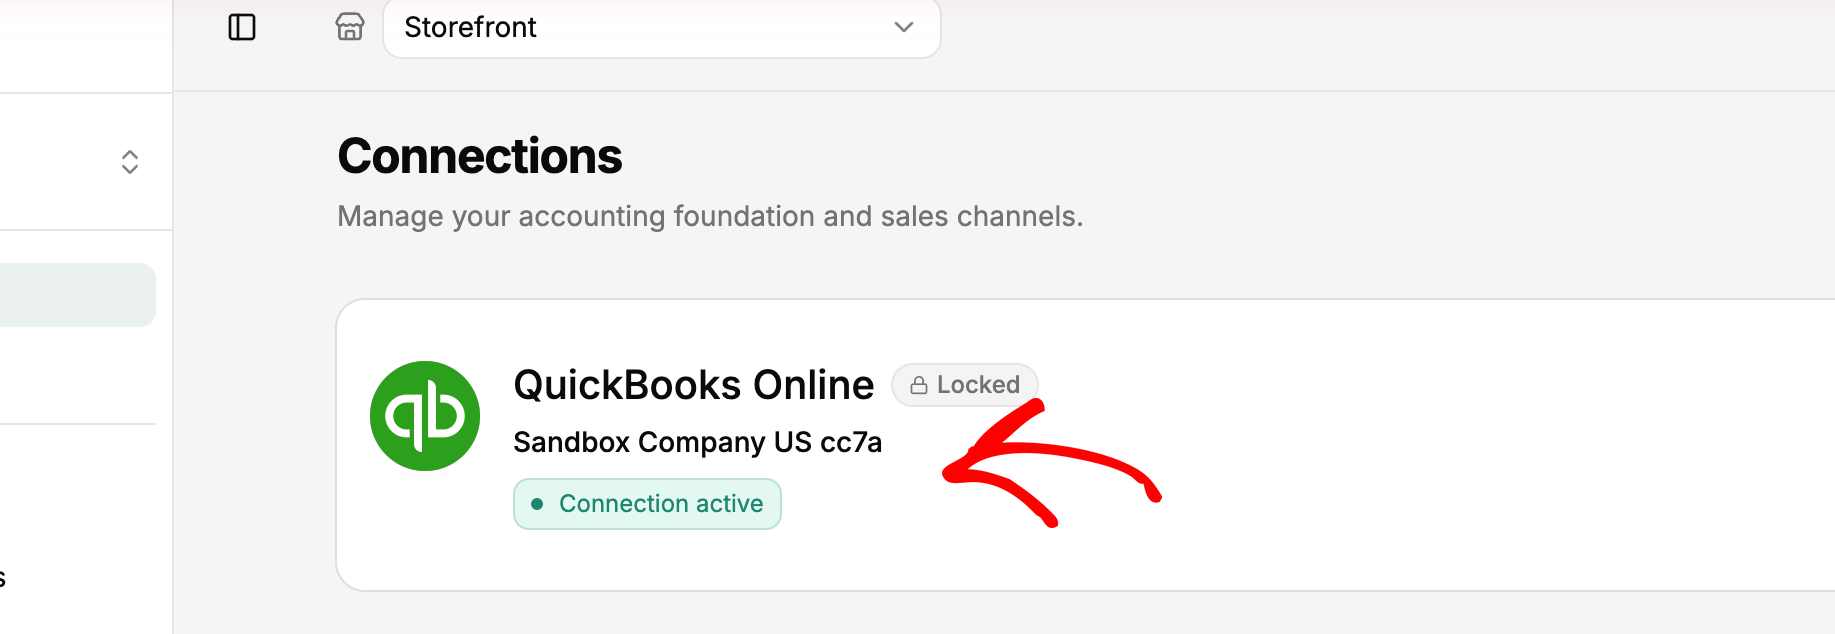
This is the irreversible one. In LedgerPort, once a QuickBooks company is linked to a Business, it can't be switched to a different company later. QuickBooks shows you a company picker during authorization. Read the company name before you click Authorize, not after.
Two practical points. First, you need admin access in both LedgerPort and QuickBooks to complete the connection, so sort out permissions before you start. Second, don't connect a "test" company first to try things out. That test company stays bound to that Business. If you do connect the wrong company, contact LedgerPort support rather than improvising a workaround.
Bookkeepers setting this up for a client: confirm the exact company with the client in writing before you authorize. "The one called Store LLC" isn't enough if they have three that sound alike.
2. Your chart of accounts, set up first
Mapping in any sync tool points at accounts that already exist in QuickBooks. If the accounts aren't there, you either map to the wrong ones or stop halfway through setup to create them.
So build them first. At minimum you'll want a clearing account for Shopify payouts, expense accounts for each fee type, a refunds or returns account, and a sales tax liability account. Our chart of accounts template for e-commerce lists exactly what to create and why. It's a short job, and it's the difference between mapping in one pass and mapping twice.
3. Your sync method
The sync method decides what kind of QuickBooks transaction each Shopify order becomes. It's the decision that most shapes how your books look. LedgerPort supports five:
- Sales Receipt. One receipt per order, with line items, tax, shipping and discounts. This is the right starting point for most direct-to-consumer stores where customers pay at checkout.
- Invoice. An invoice when the order is placed, then a payment record when it's paid in Shopify. Choose this if you sell wholesale on net-30 or net-60 terms and need open receivables in QuickBooks.
- Daily Summary. One journal entry per day that totals all of that day's orders. This suits high-volume stores, roughly 100 or more orders a day, whose accountant works from totals rather than individual orders. Daily Summary is on the Scale and Enterprise plans.
- Estimate. A non-posting record for orders that aren't confirmed yet. Most Shopify stores never need it.
- Tag-Based. Shopify order tags route orders to different transaction types. For example, wholesale-tagged orders become invoices, retail orders become receipts, and internal test orders are skipped.
Here's the trade-off nobody mentions. Per-order methods give you detail and clutter. Daily Summary gives you a clean ledger and less detail to drill into. Neither is wrong. Pick the one that matches how your accountant actually reads your books. You can change methods later, but already-synced orders stay in their original format. See understanding order sync methods for the full walkthrough, and how to record Shopify sales in QuickBooks for the accounting behind the summary approach.
4. When orders sync: triggers and start date
Triggers decide the moment an order is "ready" for QuickBooks. LedgerPort checks two groups: payment status (Paid, Authorized, Partially Paid, Pending, Refunded, Partially Refunded) and fulfillment status (Unfulfilled, Partially Fulfilled, Fulfilled). An order syncs automatically only when it matches at least one selected status in each group.
The safe default for most stores is payment set to Paid, and fulfillment set to Unfulfilled and Fulfilled. That way an order lands in QuickBooks as soon as it's paid, whether or not it has shipped. Voided orders are excluded by default, and you should leave it that way. Be careful with Pending. It pushes orders to QuickBooks before you know whether the payment succeeded.
One plan note. Triggers apply to automatic syncing only. On the Free plan there's no auto-sync, so you decide which orders to push by syncing them manually. The sync triggers doc covers every status.
Start date is the other half of "when." Before your first sync, decide how far back to go. If your bookkeeper already entered September by hand, syncing from January 1 means September gets recorded twice. Historical sync with a custom start date is available on every paid plan. Agree on the date with whoever has been keeping the books, and write it down.
5. Product mapping, and the fallback trade-off
Every Shopify product needs a matching QuickBooks item. Orders that contain an unmapped product fail with a Product Not Mapped error. That's where the 40 stuck orders in the story above came from.
LedgerPort's Auto-Map matches products by SKU or name in one click. Then you map the leftovers manually from Mapping » Products. If your Shopify and QuickBooks naming conventions already match, Auto-Map catches most of the catalog. If they don't, budget time for manual mapping.
There's also a safety net: Sync Config » Products » Use Default Product. With a fallback item set, an unmapped product posts to that placeholder instead of failing. It's a genuine trade-off. Orders stop failing, but anything that lands on the placeholder disappears from per-product reporting. If you care about product-level margins, map individually and use the fallback only for low-value items such as samples or add-ons. The product mapping guide walks through both options.
6. Payouts: net vs. gross
This is the decision that explains why "connected" stores still don't reconcile.
Shopify pays you net. Your payout is a batch of orders minus processing fees, minus refunds, minus adjustments, deposited as one lump sum. QuickBooks records sales gross: each order at its full value. If your orders post at gross and your bank shows net, the two will never match. Your revenue will look higher than your deposits every single month, exactly as it did in the opening story.
The standard fix is a clearing account. Orders post into the clearing account at gross, and fees and refunds come out of it. The payout then moves the remaining net amount to your bank account. When it's right, the clearing account returns to zero after each payout. You can run this manually on any plan. LedgerPort automates it with payout journals and fee handling on the Scale and Enterprise plans. For the full mechanics, read why your Shopify payout doesn't match QuickBooks and the payout reconciliation guide.
The six decisions at a glance
| Decision | Safe default | Choose otherwise when… | Can you change it later? |
|---|---|---|---|
| QuickBooks company | The one your accountant works in | Never: confirm it first | No, not for that Business |
| Chart of accounts | Clearing, fee, refund and tax accounts created first | Your accountant has an existing structure | Yes, going forward |
| Sync method | Sales Receipt | Wholesale terms (Invoice), high volume (Daily Summary, on Scale or Enterprise) | Yes, going forward only |
| Triggers + start date | Paid; Unfulfilled + Fulfilled; agreed start date | You capture payments manually, or only book shipped orders | Yes, going forward only |
| Product mapping | Auto-Map, then manual | Low-value items can use the fallback | Yes |
| Payouts | Clearing account | Using payout journals on Scale or Enterprise | Yes, going forward |
Want to see these settings on real screens before you commit? See how the Shopify → QuickBooks Online sync works.
How to Connect Shopify to QuickBooks Online, Step by Step
With the decisions made, the connection itself is the easy part. LedgerPort offers two starting points.
Path A: Start from the Shopify App Store
- Open the Shopify App Store and search for LedgerPort.
- Click Add app.
- Review the permissions Shopify lists, then click Install app.
- You're signed in to LedgerPort automatically, and your store is already connected.
- Now connect QuickBooks. In the left sidebar, click Connections. Under QuickBooks Online, click Connect QuickBooks.
- Sign in to QuickBooks, select the company you chose in decision 1, and click Authorize.
Path B: Start from the LedgerPort dashboard
- Go to the LedgerPort dashboard, click Get Started, and choose Sign Up. Use email or Continue with Google.
- If you signed up with email, enter the verification code sent to your inbox.
- Open Manage Business. Set the business name, currency and timezone, then click Save Changes.
- In the left sidebar, click Connections. Under QuickBooks Online, click Connect QuickBooks, sign in, select the right company, and click Authorize.
- Back on Connections, under Shopify, click Connect Shopify Store.
- Enter your store URL (for example,
your-store.myshopify.com) and click Connect. - In Shopify, review the permissions and click Install app.
Either way, you'll end on the Connections page with both platforms showing as connected. The account and store setup guide has the same steps with screenshots.
The connection uses OAuth. You authorize LedgerPort inside QuickBooks itself, so your QuickBooks password is never shared with LedgerPort. LedgerPort is an official Intuit App Partner (Silver).
Finish the setup checklist
Your dashboard now shows three items: Connect your store, Connect QuickBooks, and Enable auto-sync. To turn on auto-sync, click it in the checklist or go to Sync Config » General. Your plan decides how syncing runs:
- Free: no auto-sync. You push orders manually, up to 30 a month.
- Growth: daily automated sync.
- Scale: real-time, continuous sync.
Current plan details are on the pricing page. Before you flip auto-sync on, enter the settings from your six decisions under Sync Config and Mapping. Auto-sync applies whatever is configured at the moment it runs.
For bookkeepers setting up a client's store: have the store owner invite you rather than sharing their login. They go to Settings » Team » Invite Member and pick a role. Admin can change connections, sync configuration and mappings. Member can view logs, run manual syncs and review mappings, but can't change configuration. Team seats depend on the plan, and the Free plan is owner-only. Our client onboarding guide for Shopify and QuickBooks covers the rest of the handoff.
Your First Week: Verify Before You Trust It
"Connected" means the apps can talk. It doesn't mean the books are right. Give it one week of deliberate checking.
Day 1: sync one day of orders. On Free, push them manually. Then open three of those orders in QuickBooks and compare each one line by line with Shopify: line items, tax, shipping, discounts, and which customer it's attached to. Three orders checked carefully tell you more than three hundred skimmed.
Read the audit log. Every record carries a status. Synced means it reached QuickBooks. Error means it failed, with a reason attached. Pending means it's queued. On Hold means the order is waiting for a trigger condition to be met, such as payment being captured. On Hold is working as designed, not broken.
Fix the four errors almost everyone hits. The docs list ten. These four come up most:
- Customer Not Found. LedgerPort couldn't match the Shopify customer to a QuickBooks customer. Map the customer under Mapping » Customers. If you don't need per-customer tracking, switch to the Generic customer strategy under Sync Config » Customers. Then re-sync from Manual Sync » Orders.
- Product Not Mapped. Run Auto-Map, map the stragglers manually, or set the default product fallback from decision 5. Then filter Manual Sync » Orders by Error and re-sync.
- QuickBooks connection Unhealthy. This is the single most common error, and it usually just means the QuickBooks access token expired. Go to Connections and click Reconnect, then re-sync the orders that failed in the meantime.
- Duplicate entry. This usually happens when an order was synced manually and then picked up by auto-sync. Check QuickBooks first. If the transaction there is correct, mark the error resolved. To prevent it, don't manually sync orders that are already queued for auto-sync.
The common sync errors guide covers the other six.
Tie out your first payout. This is the real finish line. Pick one Shopify payout and trace it to the matching bank deposit, to the cent, through your clearing account. If the clearing account goes back to zero, your setup is right. If it doesn't, the gap points you to the fee, refund or adjustment that's mapped wrong. The payout reconciliation guide walks through it step by step.
FAQ
Can I connect more than one Shopify store?
In LedgerPort, each Business pairs one Shopify store with one QuickBooks Online company. You add more Businesses from the account menu, and how many you can run at once depends on your plan. See the pricing page for current limits. Each additional store gets its own Business with its own QuickBooks connection.
What happens if I disconnect?
Syncing pauses. Your existing data in QuickBooks isn't affected, but nothing new syncs until you reconnect. If you only need a short break, during an inventory count for example, use Pause Sync on the Connections page instead. It keeps your connection and settings intact.
Does this work with QuickBooks Desktop?
No. LedgerPort syncs to QuickBooks Online only. If you're on Desktop, here are your Shopify and QuickBooks Desktop options.
Now You Know What You're Authorizing
Go back to that QuickBooks window and the Authorize button. It's still one click. The difference is that the click now comes after the decisions instead of before them. You've confirmed the company, built the accounts, picked a sync method that matches how your accountant reads the books, set triggers and a start date, mapped your products, and planned for the net-vs-gross gap.
The green Connected badge was never the finish line. The first payout that ties out to your bank deposit is.
Make the six decisions, then connect in a few minutes. LedgerPort's Free plan syncs up to 30 orders a month with no credit card required. That's enough to push a few days of real orders and open three of them in QuickBooks before you pay anything.
Or, if you want to see the settings first: how the Shopify → QuickBooks Online sync works.
